Integrating different software applications is one of the most efficient ways to ensure a more streamlined approach to business operations, especially in the current times.
And integrating NetSuite with Expensify helps you achieve just that.
The two systems make expense tracking and business accounting simpler and more efficient.
So, whether you are looking for data accuracy or enhanced financial management, the NetSuite and Expensify integration takes you one step closer to your goal.
Let’s explore the step-by-step integration process along with its practical benefits.
- 62% of businesses say NetSuite integration helped them reduce business costs.
- Integrate NetSuite with Expensify to track business expenses more effectively.
- There are four methods to integrate NetSuite with Expensify: SuiteTalk, SuiteScript, NetSuite Connectors, and SuiteCloud Connector.
- Expensify automates employee reimbursement, reducing administrative burdens and speeding up the approval process.
NetSuite integrations – A quick overview
Businesses rely on NetSuite integrations to ensure data consistency and operational efficiency.
It helps them establish real-time visibility for project management and decision-making.
For example, NetSuite integration with Wrike streamlines different business processes and increases collaboration.
Similarly, you have other NetSuite integrations that improve productivity and support your cost-saving initiatives through automated data synchronization.
NetSuite is an ERP solution that easily connects with other software applications to provide a ton of benefits.
The three indisputable benefits of NetSuite integrations
1. Real-time visibility
By connecting NetSuite with other software applications, like Salesforce, you can access real-time data for informed decision-making.
It empowers you to be ready for a knee-jerk response to any market condition.
2. Cost-saving
Automation is the first difference you’ll experience in your daily operations. You will notice how it eradicates manual input and minimizes human error.
It also reduces your business costs and frees up your credible resources to focus more on developing strategies and running core business operations.
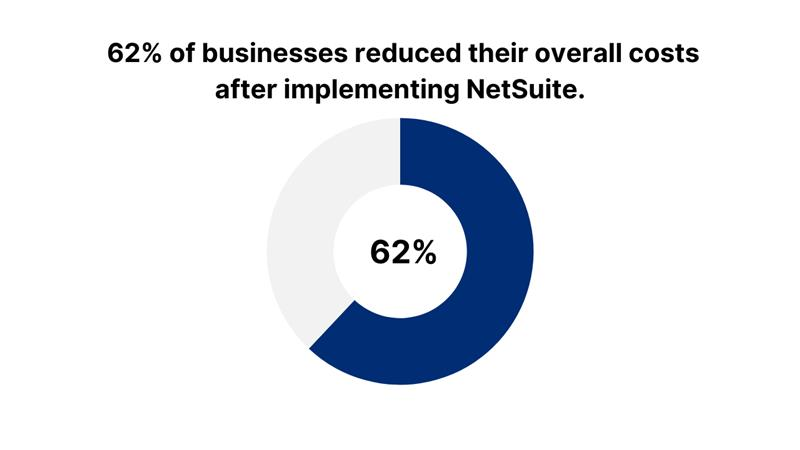
62% of businesses say NetSuite integrations help reduce business costs, especially noticing a decrease in purchasing expenses due to higher inventory control.
3. Scalability
Every small business looks for that next step. NetSuite integrations help you get there.
These integrations help you expand your business as you get access to advanced tools for better management and workflow efficiency.
NetSuite integrations: The four ways
There are different ways for NetSuite integrations. Let’s talk about the common four ways.
Method #1: SuiteTalk
It is an integration tool that gives access to NetSuite functionalities.
Method #2: SuiteScript
This is a NetSuite API that helps businesses customize NetSuite functionality to meet specific business needs.
Method #3: NetSuite Connectors
NetSuite connectors are essentially third-party services or systems that automate data synchronization between NetSuite and other systems, like e-commerce marketplaces and POS systems.
Method #4: SuiteCloud Connect
These are a host of tools that allow businesses to connect NetSuite with various third-party applications.
What is Expensify?
Expensify is an expense management software that helps businesses track receipts and advanced tax obligations.
It offers flexible travel integrations to help you track mileage and reimbursements.
You can get real-time automated expense reports to evaluate business expenses and cost-saving solutions.
It is ideal for businesses using accounting software solutions, such as Xero and QuickBooks Online.
It can handle high volumes of data, simplifying the preparation of expense reports and fastening approvals.
It allows you to reimburse expenses through direct bank deposits. Simply set up your bank account with Expensify and automate reimbursements to your employees.
Expensify NetSuite integration – Finance management made simple
Whether it is expense categorization or receipt scanning, Expensify with its user-friendly interface makes work effortless and simple
NetSuite is a robust financial management system with advanced functionality to manage cash flow, making financial reporting quicker and more accurate.
Expensify and NetSuite integrate to provide businesses with an efficient workflow.
It supports different financial management processes, like expense tracking and managing account payables and receivables.
You can use this integration to get real-time financial insights and manage corporate cards.
This integration automates your finance management so you can eliminate redundant and time-consuming processes like manual data entry.
This automation also automates reimbursements, creating a positive work culture.
It is a powerful integration that automates data synchronization between the two systems, simplifying bookkeeping and accounting for businesses by ensuring your data is up-to-date and consistent across channels.
Small businesses can use this integration to synchronize bank transactions and speed up the approval process for faster reimbursements.
It plays a crucial role in reducing administrative burdens as automation eliminates manual operations to save time and resources.
The 5-step guide to integrating Expensify with NetSuite
Here’s a step-by-step process of integrating Expensify with NetSuite.
Step #1: Make sure you have active accounts
The first step of integrating Expensify with NetSuite is to ensure you have active accounts for the two systems.
Step #2: Change integration settings
Launch Expensify and go to its Integration Settings. Choose NetSuite as your option.
Step #3: Authentication
Follow the instructions provided by Expensify to authenticate the NetSuite account within the expense management software.
Step #4: Set up integration settings
You will now configure integration settings by mapping out your expense categories and GL accounts. This step prepares the systems for automated data synchronization.
Step #5: Automate synchronization
Now the two systems are integrated.
You can begin data synchronization between Expensify and NetSuite and manage finances effectively. You can benefit from real-time data visibility for informed decision-making.
Integrating Expensify with NetSuite? Here’s what you should know.
Integration between Expensify and NetSuite is simple. However, it is best to conduct a test using a NetSuite Sandbox account and Expensify Test Policy.
Create an Expensify test policy
You can only create Expensify Test Polisy if you are the policy admin. So, make sure you log in as the policy admin. Then, go to Settings and choose Policies.
Now it’s up to you to decide whether you want to create a new policy to duplicate an existing one.
If you want to create a new policy, you can click on New Policy. The option is available in the top right corner of your screen.
If you want to duplicate an existing policy, you can choose the gear icon and confirm Duplicate.
While you can create a new policy, it is better to duplicate existing policies as it simplifies the transition.
Connect Expensify Test Policy to NetSuite Sandbox
Follow these steps to connect the Expensify Test Policy to NetSuite Sandbox.
The first step is to use an underscore between NetSuite’s sandbox and policy number when you provide your account ID.
Format it like this: 2222222_SB1.
You can find your NetSuite ID by clicking on the Company Information Page. Or simply, look at your URL after logging into your NetSuite account.
If you have connected your Expensify Test Policy to NetSuite Sandbox already, you can begin the configuration process.
Go to Settings. Click on Policies and choose the right policy.
Now you will be on the policy homepage.
Here you will choose Connections and go to the NetSuite section to select the Configure button.
The 4 practical ways NetSuite and Expensify integration helps small businesses
You may wonder what a NetSuite integration with Expensify can do for your business. Here are 4 practical ways it benefits your business.
1. Automated data transfer
You can easily lose track of business expenses without a system in place. This can lead to guesswork and ultimately costly damages.
This integration automates data transfer, eliminating manual data entries and human error.
All your transactions are up-to-date as the system monitors your cash inflows and outflows in real time.
Whatever expense gets logged in Expensify, it is automatically synced with NetSuite’s centralized database, accessible to all relevant business units.
Similarly, all expense categories, projects, and customer information available in your NetSuite database are imported into Expensify.
What it does is it ensures all your money gets accounted for without manual data entry.
2. Multi-layers workflow approvals
You can use this integration to send expense reports to all relevant parties.
It creates a step-by-step approval flow, making it an ideal system for corporates and hierarchical systems.
It allows managers across hierarchies to review financial reports and approve them sequentially.
3. Track receipts
Filing tax returns can be painful without financial receipts.
Reduce that burden by never losing track of your financial receipts and invoices.
You can use Expensify’s receipt scanning app to categorize your transactions and take screenshots of all receipts.
They can be used to create expense reports or for tax preparation.
4. Bank reconciliations
Filing tax returns can be painful without financial receipts.
Reduce that burden by never losing track of your financial receipts and invoices.
You can use Expensify’s receipt scanning app to categorize your transactions and take screenshots of all receipts.
They can be used to create expense reports or for tax preparation.
The bottom line
NetSuite Expensify integration is an advanced solution that streamlines financial management for businesses.
It simplifies expense tracking, helping businesses create real-time visibility and cost-efficiency.
It automates reimbursements and speeds up the approval process.
We at Ledger Labs come forward with our 12+ years of experience in the ERP industry to help your business with all kinds of Netsuite integration.
We also provide integration support, improving business processes and workflow efficiency.
Book an appointment to talk to us right away.


