
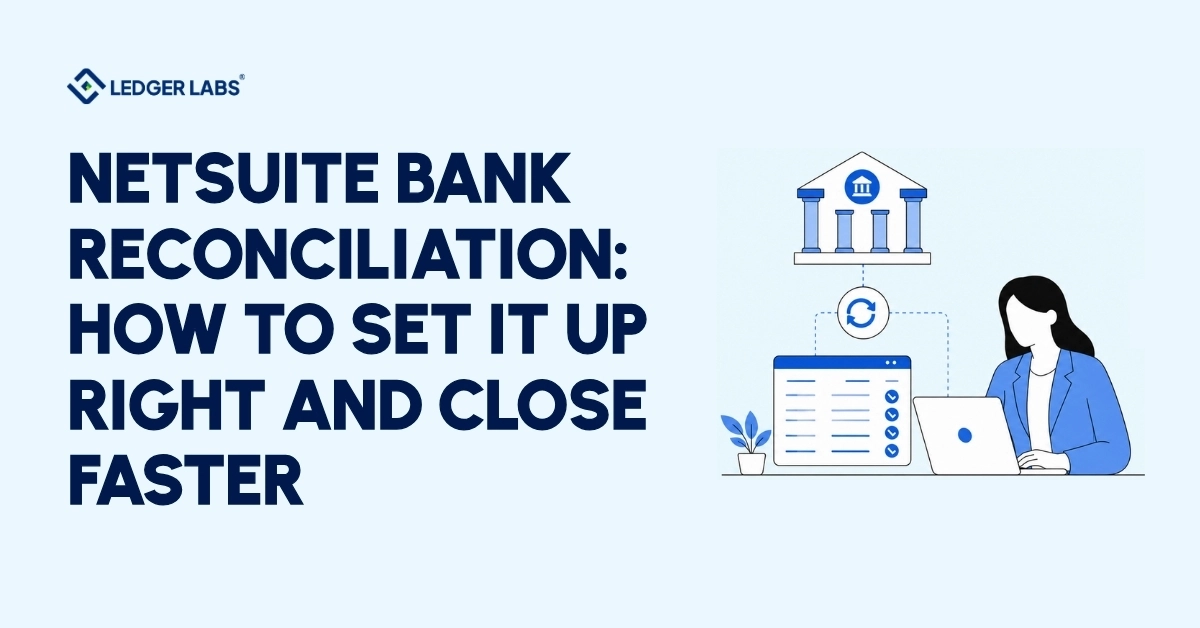
NetSuite bank reconciliation works in two steps: first, match bank data, then reconcile the account statement. When set up correctly, this process largely runs itself.
However, many teams do not have it set up properly. Common issues include an outdated navigation path that hasn’t changed since 2021.1, no Bank Feeds connection, resulting in manual CSV downloads every month, missing Reconciliation Rules, and payment processor settlements that don’t match any General Ledger transactions because the clearing account setup wasn’t completed. As a result, a reconciliation that should take one hour can take three days every month.
The solution is not to put in more effort, but to fill the configuration gaps that cause all this manual work.
This guide will show you how to set everything up: the modern two-step flow and updates from 2021.1; how to connect Bank Feeds for automatic transaction imports; how to create Reconciliation Rules to minimize manual matching; and how to identify seven discrepancy types that prevent the Difference field from reaching zero.
This page covers bank and credit-card reconciliation only. Receivables, payables, inventory, intercompany and accruals reconcile against different sources — for which balance-sheet accounts to reconcile, what each agrees to and who reviews it, read NetSuite account reconciliation: what’s included, what’s not.
By the end, you’ll have what you need for a smooth reconciliation process and to close your accounts faster.
Key Takeaways
- NetSuite bank reconciliation runs across two pages: Match Bank Data and Reconcile Account Statement; both steps are required to finalize a period.
- The original Reconcile Bank Statement page was deprecated in NetSuite 2021.1, most guides still reference it, and it no longer exists on current accounts.
- Bank Feeds connects your financial institution directly to NetSuite and imports transactions daily, eliminating the need for manual CSV downloads for accounts with over 100 monthly transactions.
- Reconciliation Rules auto-match recurring transactions to GL entries; by month two, a well-configured account typically reaches an 80% auto-match rate.
- PayPal, Stripe, and Amazon settlements require a clearing-account architecture; direct transaction-level matching never works for payment-processor deposits.
- A non-zero Difference field always has a traceable cause; never force a reconciliation before identifying and resolving the gap.
Prerequisites for Bank Reconciliation in NetSuite
Before starting a reconciliation, confirm the following. Most of these are quick checks, but an unreconciled prior period or missing transactions can take meaningful time to resolve, and discovering either mid-reconciliation is worse than finding it before you start.
When we onboard a new NetSuite client, we run through this list before touching the first reconciliation. Skipping any one of these adds time on the back end.
- User permissions
The reconciling user needs the Reconcile Bank Statement (or Manage Bank Statement Reconciliation) permission enabled on their role.
To verify: Setup > Users/Roles > Manage Roles > [select the role] > Permissions > Transactions tab.
If the permission isn’t listed, the Match Bank Data page won’t appear in that user’s menu.
- Accounting period is open
If the period you’re reconciling is locked, you won’t be able to make adjustments when discrepancies arise.
Check: Setup > Accounting > Manage Accounting Periods. The period should show as Open. If it’s Closed, you’ll need administrator access to reopen it before starting.
- All transactions for the period are entered
NetSuite reconciles what’s in the GL. If invoices, bills, or journal entries for the period are missing, you’ll have unmatched bank lines that aren’t timing differences; they’re recording gaps.
To check: run a GL account register for the bank account filtered to the period date range. Any expected transactions that don’t appear need to be entered before reconciliation starts.
- Previous period is closed and reconciled
Your opening balance for the current period should match the closing balance from the last reconciliation.
If it doesn’t, do not start the current period; go back to the prior reconciliation in progress under Transactions > Bank > Match Bank Data, complete it, then return.
Starting a new reconciliation on top of an unresolved prior period compounds the problem every month it’s deferred.
- Bank statement for the period
You need the ending balance and statement date from your bank. If you’re using Bank Feeds (Section 5), transactions import automatically; verify the last import date at Setup > Accounting > Financial Institution > List.
If the Last Import Date is more than 48 hours old, refresh the connection before starting. If you’re not using Bank Feeds, download a CSV or OFX file from your bank’s portal and have it ready to upload.
- Exchange rates updated (multi-currency accounts)
If the account transacts in a foreign currency, confirm exchange rates for the period are current: Setup > Accounting > Manage Currency Exchange Rates.
Stale rates produce reconciling differences that appear to be real discrepancies but disappear once the rates are corrected, catching this before reconciliation prevents a diagnostic loop.
How to Do Bank Reconciliation in NetSuite: Step-by-Step
Step 1: Import Your Bank Statement
If you are using Bank Feeds, you can skip this step because transactions import automatically every day.
If you need to import transactions manually, start on the Match Bank Data page rather than from another menu.
Navigate to: Transactions > Bank > Match Bank Data
In the top right corner of the Match Bank Data page, click Import Bank Statement.
For OFX or QFX files:
- Click Import Bank Statement
- Select your OFX or QFX file; NetSuite parses these automatically, no column mapping required
- Select the Account
- Click Import
For CSV files:
- Click Import Bank Statement
- Select your CSV file
- Select or create a parser that maps your CSV columns to NetSuite fields (Date, Description, Amount, Transaction Type)
- Select the Account
- Click Import
To verify the import completed: go to Transactions > Bank > Banking Import History; confirmed imports show a status of Complete. If the import failed, the error message will identify the cause.
The most common failure is a date format mismatch; confirm dates are formatted MM/DD/YYYY and that debit amounts use negative numbers, not parentheses.
Step 2: Match Bank Data
Navigate to: Transactions > Bank > Match Bank Data
- Select the Bank Account, currency, and subsidiary auto-populate
- The page shows two side-by-side grids:
- Left (Imported Bank Data): transactions from your bank statement
- Right (Account Transactions): GL entries in NetSuite for the same account and period
3. NetSuite runs Reconciliation Rules automatically on import; matched transactions move to the Review tab immediately
4. For unmatched items remaining in both grids: select the bank transaction on the left and the corresponding GL entry on the right, then click Match
5. For GL transactions that cleared the bank but have no imported bank line: select the GL entry on the right and click Clear; it moves to the Review tab with a Cleared status
6. For imported bank lines you want to temporarily remove from the matching process: click Exclude; they move to the Excluded subtab and can be restored at any time
7. When all items are matched, cleared, or intentionally excluded, click Submit
To manage unmatched items, sort both grids by Amount, with the largest first. Use the search field to filter by amount or date range for specific transactions. The Reconciliation Rules will match recurring transactions automatically by the second month; expect more manual matching in the first month.
For NetSuite clients, the Submit action is essential. A preparer must match and submit transactions, then a controller or manager reviews the Review tab before moving to Step 3. No transaction can move to Step 3 until this review is complete.
Common issues include:
- If transactions aren’t visible on the Match Bank Data page, ensure the account record has “Use Match Bank Data and Reconcile Account Statement Pages” enabled. Check under Lists > Accounting > Accounts > Edit > Financial subtab.
- Prior period transactions may show up in the current queue because they were matched but not submitted in previous sessions. Submit or clear these before starting the current period to keep the queue clean.
Step 3: Reconcile the Account Statement
Navigate to: Transactions > Bank > Reconcile Account Statement (or click “Reconcile Account Statement” directly from the Match Bank Data page after submitting)
- Select the Account
- Enter the Statement Date, the end date printed on your bank statement
- Enter the Ending Statement Balance, the closing balance printed on your bank statement
- Review the two subtabs:
- Reconcile subtab: all submitted transactions from Step 2; these are the items being counted toward your reconciled balance
- Outstanding subtab: items not yet submitted, prior period outstanding checks, deposits in transit, anything not matched in Step 2. These are expected to be there; they carry forward until they clear.
5. Watch the Difference field; it calculates as:
(Ending Statement Balance) − (Last Reconciled Balance + Reconciled This Statement)
- Difference is positive: more money on the bank statement than in your matched GL transactions, likely a deposit recorded in NetSuite that hasn’t cleared, or a bank credit not yet entered
- Difference is negative: more money in your matched GL transactions than on the bank statement, likely a payment that cleared the bank but isn’t in NetSuite, or a duplicate GL entry
- Difference = 0: everything is accounted for
6. When Difference = 0, click Reconcile
Do not force a reconciliation if the Difference is not zero, as this hides the issue. Common causes and solutions are in Section 7.
A non-zero Difference often indicates one of three problems: a bank-cleared transaction missing in NetSuite, a NetSuite transaction that didn’t clear, or a data entry mistake. Section 7 covers how to resolve each issue.
Step 4: Export the Reconciliation Record
After clicking Reconcile, export and save the Reconciliation Summary Report immediately, before any changes in the period occur.
Navigation: Reports > Banking/Budgeting > Reconciliation
(or click “Reconciliation Summary” in the top-right corner of the Reconcile Account Statement page)
Export to PDF. Save to your working papers for the period.
NetSuite’s reconciliation report updates in real time based on current transaction data. If you edit, void, or add any transaction after you close the page, the report will change. It doesn’t take a snapshot at the time of reconciliation, so what you see tomorrow may not match what you reconciled today.
To find a completed reconciliation from a previous period, go to Transactions > Bank > Reconcile Account Statement, and select the account.
You’ll see the Last Reconciled Date and Balance at the top of the page. For full details of a past reconciliation, run the Reconciliation Summary Report for the desired date range.
How to Set Up Bank Feeds for Automated Reconciliation?
Bank Feeds is a free NetSuite SuiteApp that connects directly to your financial institutions and imports transactions daily, eliminating the need for manual CSV downloads.
Who should use it: Any account with more than 100 transactions per month. Below that threshold, manual import is manageable. Above it, Bank Feeds is the difference between a 3-hour monthly task and a 10–15 minute daily review.
Before You Install: Prerequisites
Three features must be enabled in NetSuite before Bank Feeds can be installed. Check these first; if they’re not active, the SuiteApp either won’t install or won’t function after installation.
Navigate to: Setup > Company > Enable Features
- Transactions tab: Enable Electronic Funds Transfer and Automated Clearing House
- Accounting tab: Enable Bank Data Matching and Reconciliation
You’ll need Administrator access to enable features and to install the SuiteApp.
Installation
- Go to SuiteApps in the top navigation
- Search “Bank Feeds”
- Click Bank Feeds SuiteApp by Oracle NetSuite
- Click Install (top right)
- Verify installation: Customization > SuiteCloud Development > Installed SuiteApp List; status should show Complete
Connecting a Financial Institution
- Navigate to: Setup > Accounting > Financial Institution > List
- Click New Financial Institution
- Search for your bank; Bank Feeds supports 10,000+ institutions across the US, Europe, Asia, Australia, and New Zealand
- Select your institution from the results
- NetSuite redirects you to your bank’s own secure login screen to authorize the connection; you’re authenticating through the bank’s interface, not entering credentials directly into NetSuite. The connection is handled via OAuth or through Yodlee, NetSuite’s bank data aggregator, depending on the institution.
- After authorization, NetSuite automatically imports the last 60 days of transactions
- Going forward, transactions import overnight; timing varies by institution, typically between midnight and 6 AM
If your bank isn’t in the supported list: not all community banks, credit unions, and international institutions are covered. If your institution doesn’t appear, use the manual CSV or OFX import workflow in Section 4 Step 1 combined with Reconciliation Rules (Section 6) for auto-matching after import. The matching automation still applies; only the import step stays manual.
What Changes After Setup
Once Bank Feeds is active, the monthly reconciliation session becomes a daily exception review.
Here’s what that looks like in practice:
Each morning, the reconciling user opens Transactions > Bank > Match Bank Data. Auto-matched transactions from the overnight import appear on the Review tab, already matched by Reconciliation Rules and awaiting confirmation. The user reviews and submits them.
For exceptions: items that didn’t auto-match are matched manually from the two-sided grid. For well-configured accounts, this takes 10–15 minutes per day.
The result: by month-end, most transactions are already matched and submitted. The monthly reconciliation reduces to entering the ending balance on the Reconcile Account Statement page and confirming Difference = 0. What previously took 2–3 days takes under an hour.
To check import status at any time:
Transactions > Bank > Banking Import History. Failed imports show an error status with a reason, the most common cause is a bank password change that severs the connection.
If a connection goes inactive, re-authenticate via Setup > Accounting > Financial Institution > List > [select institution] > Re-authenticate.
What goes wrong here:
- Duplicate imports: if Bank Feeds is active and you also run a manual CSV import for the same account and period, transactions will appear twice on Match Bank Data. Disable manual imports for any account where Bank Feeds is connected.
- Connection drops after a bank password change: the most common reason Bank Feeds goes silent. Check Banking Import History if transactions stop appearing, re-authenticate via the Financial Institution list.
- Partial imports: some institutions throttle how many transactions they release per import. If your import history shows Complete but transaction counts seem low, check whether your bank has a daily transaction limit on data exports.
Using Reconciliation Rules to Automate Transaction Matching
Reconciliation Rules tell NetSuite how to automatically match imported bank transactions to GL entries, without manual intervention for every line.
When configured correctly, they handle the predictable, recurring portion of every reconciliation automatically. What’s left is exceptions only.
System Rules
NetSuite includes built-in system rules that activate automatically when bank data is imported. To view and manage them: Transactions > Bank > Reconciliation Rules > System Rules tab. They’re on by default and can be enabled or disabled per account.
One rule worth knowing: “Match on Amount when Date is within 3 Previous Days.” For accounts with recurring same-amount transactions, subscription billing, fixed ACH payments, this rule alone eliminates a significant portion of manual matching.
Custom Rules
Custom rules handle recurring, predictable transactions, payroll, rent, subscription fees, and known vendor payments with consistent amounts.
To create a custom rule:
- Navigate to: Transactions > Bank > Reconciliation Rules
- Click New
- Enter a specific Name (e.g., “ADP Payroll – $14,250” not just “Payroll”)
- Select the Bank Account; rules are account-specific, not global
- Set Conditions: match on Transaction Type, Amount, Memo, or Payee Name using operators (Equals, Contains, Starts With)
- Click Save
Rule priority matters: NetSuite applies system rules first, then custom rules in the order they appear in the list. The first applicable rule wins. Order your rules from most specific to least specific; a broad rule placed above a narrow one will claim transactions the narrow rule was meant to handle.
Auto-matched transactions still require submission on Match Bank Data before moving to Reconcile Account Statement. Automation handles the matching; a human still reviews and submits.
When we set up NetSuite for new clients, we build custom rules for every recurring transaction in the first month: payroll, rent, utilities, subscription platforms. By month two, the auto-match rate is typically above 80%. Manual matching drops to exception handling only.
When Rules Aren't Enough
Rules break down for three scenarios:
- Ecommerce settlement files (Stripe, PayPal, Amazon): net deposits don’t correspond to individual GL transactions. Requires a clearing account architecture, not rules. Covered in Section 7.
- NetSuite OneWorld: rules only apply to the subsidiary associated with the bank account. Intercompany transactions need separate handling.
- Variable-amount recurring payments, utilities, usage-based billing. Rules matching on exact amounts will miss these every period.
If you’re hitting these regularly, the issue is upstream architecture, not rules configuration.
Common NetSuite Bank Reconciliation Discrepancies and How to Fix Them
When the Difference field does not reach zero, you can always find the reason for the gap. Reconciliation differences never occur for no reason. Before looking at the different types of discrepancies, start by asking these two important questions:
Which side is the gap on?
- If your Difference is positive, the bank statement balance exceeds your matched GL transactions. Something cleared the bank that isn’t matched in NetSuite.
- If your Difference is negative, your matched GL transactions exceed the bank statement balance. Something in NetSuite didn’t clear the bank or is recorded at the wrong amount.
What is the magnitude?
Round numbers (exactly $500, $1,000, $14,250) usually point to a missed transaction or a duplicate. Odd amounts often indicate fees, interest, or a data-entry error in an existing transaction.
Work through the relevant discrepancy below.
Discrepancy 1: Transaction in NetSuite, Not on Bank Statement
A GL entry exists, but there is no corresponding imported bank line.
Likely causes: Outstanding check (issued but not yet cashed), deposit in transit (recorded in NetSuite but not yet processed by bank), data entry error (transaction entered in NetSuite but never actually executed).
Fix:
- Determine which cause applies, check whether a physical check was issued and to whom, or whether a deposit was made but hasn’t cleared yet
- If it’s an outstanding check or deposit in transit: do not force a match. Leave the item unmatched on the Match Bank Data page
- On the Reconcile Account Statement page, the item will appear on the Outstanding subtab; this is expected and correct. Outstanding items carry forward to the next period automatically
- Document the item in your working papers: transaction date, amount, payee or payer, and expected resolution date
- If a check has been outstanding for more than 60 days: contact the payee to confirm receipt. If the check is lost, place a stop payment through your bank and reissue
Discrepancy 2: Transaction on Bank Statement, Not in NetSuite
An imported bank line sits unmatched with no corresponding GL entry.
Likely causes: Bank service fee not recorded, wire transfer fee not recorded, interest income not entered, NSF fee charged by bank, payment received but cash receipt not entered in NetSuite.
Fix for bank fees and charges:
- Identify the fee type and amount on the bank statement
- Navigate to: Transactions > Bank > Write Checks (or Transactions > Payables > Enter Bills if coding to a vendor)
- Select the bank account, enter the date and amount, code to the appropriate expense account (Bank Charges, Bank Fees, or equivalent)
- Click Save
- Return to Transactions > Bank > Match Bank Data and match the new GL entry to the imported bank line
Fix for interest income:
- Navigate to: Transactions > Bank > Make Deposits or create a journal entry debiting the bank account and crediting Interest Income
- Enter the date and amount from the bank statement
- Save, then return to Match Bank Data and match
Fix for missing cash receipt:
- Enter the customer payment under Transactions > Customers > Receive Payments
- Apply to the correct invoice
- Save, return to Match Bank Data and match
Discrepancy 3: PayPal, Stripe, and Amazon Settlement Differences
This is the most common reconciliation problem we diagnose on new ecommerce NetSuite engagements, and the one most guides skip entirely.
Payment processors deposit net settlement amounts, gross sales minus fees, refunds, and holds, as a single bank deposit. That net deposit rarely matches any individual GL transaction amount, which is why direct transaction-level matching never works for these accounts.
The fix is a clearing account architecture:
- Create a clearing account in your Chart of Accounts (e.g., “Stripe Clearing,” “PayPal Clearing”) , account type: Bank or Other Current Asset
- Record individual sales transactions in NetSuite to the clearing account, not directly to your bank account
- When the net settlement deposits to your bank account, record a transfer from the clearing account to the bank account for the net deposit amount
- On Match Bank Data, match the bank deposit to the clearing account transfer
- The difference between gross sales and the net deposit (fees, refunds, timing) reconciles separately against the processor’s monthly settlement report
When we take over an ecommerce NetSuite engagement, clearing accounts for Stripe, PayPal, and Amazon are configured before the first reconciliation runs, not after the first unexplained difference appears. If you’re currently trying to match individual order transactions to bank lines, that’s the root cause. The architecture needs to change, not the matching effort.
Discrepancy 4: Transaction Not Appearing on the Match Bank Data Page
A GL transaction exists, but it won’t appear on the Match Bank Data page.
Likely causes and fixes:
Cause A – Transaction type excluded from reconciliation
- Navigate to: Setup > Accounting > Accounting Preferences
- Check “Show All Transaction Types In Reconciliation”
- Save and return to Match Bank Data and verify the transaction now appears
Cause B – Subsidiary mismatch (OneWorld accounts)
Reconciliation Rules and the Match Bank Data page only show transactions for the subsidiary associated with the bank account. If the transaction was coded to a different subsidiary, it won’t appear.
- Open the transaction record and check the Subsidiary field
- If incorrect, edit the transaction to the correct subsidiary and save
- Return to Match Bank Data
Cause C – Transaction voided after being cleared
A transaction that was previously cleared in a reconciliation and then voided creates a limbo state; it no longer exists as a GL entry but may still appear as a cleared item.
- Check the transaction status in the GL register for the bank account
- If voided, create a replacement transaction if the original was legitimate
- If the void was correct, create a reversing journal entry to clear the outstanding item from the reconciliation
Discrepancy 5: Opening Balance Doesn’t Match Last Period’s Closing Balance
The Last Reconciled Balance on the Reconcile Account Statement doesn’t align with your expectations from the prior close.
Likely cause: A transaction was edited, voided, or added after the prior period was reconciled. Because NetSuite’s reconciliation report is dynamic, the historical balance was retroactively updated.
This is the discrepancy we encounter most frequently on inherited NetSuite engagements, usually the result of months of post-close edits accumulating without anyone noticing the opening balance drift.
Fix:
- Run the Reconciliation Summary Report for the prior period: Reports > Banking/Budgeting > Reconciliation, filter to the prior period date range
- Compare the closing balance on the report to what was recorded at the time of close (your saved PDF from that period, which is why Section 9 recommends exporting immediately after every reconciliation)
- Identify which transaction changed; look for edits, voids, or new transactions with dates in the prior period
- Determine whether the change was legitimate:
- If legitimate: document the adjustment in your working papers and note the opening balance variance explanation
- If incorrect: the period may need to be reopened to reverse the change. Navigate to Setup > Accounting > Manage Accounting Periods; reopening requires Administrator access
5. Once resolved, the Last Reconciled Balance on the current period’s Reconcile Account Statement page should reflect the corrected prior period close
Discrepancy 6: Duplicate Entries
The same transaction appears twice in NetSuite but only once on the bank statement.
Likely causes: Manual entry error, Bank Feeds import running alongside a manual CSV import for the same period and account.
Fix:
- Open both transaction records and confirm it’s a true duplicate: same date, same amount, same payee or payer. Rule out two separate but similar transactions before voiding anything
- Determine which record is correct; check supporting documentation (vendor bill, remittance, bank confirmation)
- Open the duplicate transaction record
- Click Actions > Void; do not delete. Voiding preserves the audit trail; deletion removes it
- Confirm the void
- Return to Transactions > Bank > Match Bank Data and match the remaining transaction to the bank line
- If the duplicate was caused by Bank Feeds running alongside a manual import: disable manual imports for that account going forward under Transactions > Bank > Banking Import History; do not upload CSVs for accounts where Bank Feeds is active
Discrepancy 7: Currency Conversion Differences (Multi-Currency Accounts)
For accounts that transact in foreign currencies, reconciliation differences arise when the exchange rate used by the bank on the transaction date differs from the rate recorded in NetSuite.
Likely cause: NetSuite’s exchange rate for the period doesn’t match the bank’s actual settlement rate on the specific transaction date.
Fix:
- Identify the transaction with the currency difference, and compare the bank statement amount in your base currency to the NetSuite GL amount
- Check the exchange rate NetSuite used: open the transaction record and review the Exchange Rate field
- Verify the bank’s actual rate for that transaction date, available on the bank statement or through your bank’s historical rate lookup
- If the rates differ: edit the transaction record in NetSuite and update the Exchange Rate field to match the bank’s actual rate
- Save; the GL amount in base currency updates automatically
- Return to Match Bank Data and match
For accounts with frequent foreign currency transactions, confirm that exchange rates are current under Setup > Accounting > Manage Currency Exchange Rates before starting each reconciliation; this prevents most currency differences from appearing in the first place.
Conclusion
NetSuite’s bank reconciliation module can run mostly on its own, but only if it’s configured correctly from the start. The steps, the automation, the rules, the report export- none of it works the way it should when the setup is wrong, or the process hasn’t been updated since the 2021.1 feature change.
If you’ve worked through this guide, you now have the full picture: the modern two-step flow, how to get Bank Feeds running, how Reconciliation Rules eliminate the bulk of manual matching, and how to diagnose the discrepancies that keep the Difference field from hitting zero.
What separates teams that close in three days from teams that close in two weeks is rarely effort. It’s almost always whether the environment was set up to support a clean close, and whether someone caught the configuration gaps before they became monthly recurring problems.
If your bank reconciliation is still taking longer than it should, the issue is almost certainly one of the following: the wrong architecture for your payment processor settlements, Reconciliation Rules that haven’t been built out, or a prior period problem that’s been carrying forward unresolved.
Those are solvable problems, and they’re exactly the kind of work our team handles when we take over a NetSuite accounting engagement. We set up the Bank Feeds connection, build the Reconciliation Rules, establish the preparer-reviewer workflow, and make sure the first reconciliation closes clean. From there, it stays clean.
If that’s where you are, we’re happy to take a look.
FAQs
1. What is the difference between Match Bank Data and Reconcile Account Statement in NetSuite?
Match Bank Data is where you import bank transactions and match them to GL entries. Reconcile Account Statement is where you enter the ending balance and finalize the reconciliation. Both steps are required, you cannot reconcile without first submitting matched transactions from Match Bank Data.
2. Why don't my transactions appear on the NetSuite Match Bank Data page?
The most common cause is that the account record doesn’t have “Use Match Bank Data and Reconcile Account Statement Pages” enabled, check the account record in Chart of Accounts. Other causes: the transaction type is excluded from reconciliation (fix via Setup > Accounting > Accounting Preferences > Show All Transaction Types In Reconciliation), or the transaction belongs to a subsidiary that doesn’t match the bank account’s subsidiary in a OneWorld environment.
3. How do I reconcile a bank account in NetSuite without importing bank data?
Select the GL transaction on the Match Bank Data page and click Clear, it moves to the Review tab with a Cleared status and flows through to Reconcile Account Statement without a matching imported bank line. This works for low-volume accounts or one-off situations where importing isn’t practical.
4. Does NetSuite support automated bank reconciliation?
Yes, through the Bank Feeds SuiteApp (free, available in SuiteApps) and Reconciliation Rules. Bank Feeds connects your financial institution and imports transactions daily. Reconciliation Rules auto-match imported transactions to GL entries based on conditions you define. The 2026.1 release added AI-powered enriched bank data matching that improves accuracy for ambiguous transactions. For most clients we manage, this combination eliminates the majority of manual matching work within the first reconciliation cycle.
5. How often should I reconcile bank accounts in NetSuite?
Monthly at minimum; cash balances are a close dependency and financial statements can’t be finalized until bank accounts are reconciled. For high-volume accounts where cash visibility is operationally critical, weekly or daily reconciliation via Bank Feeds is more appropriate. With Bank Feeds active, daily reconciliation adds minimal time to the workflow.
6. What does it mean when NetSuite shows a reconciliation difference that won't go to zero?
A persistent non-zero Difference means an unresolved gap between your GL cash balance and the bank statement balance. Common causes: a transaction that cleared the bank but isn’t in NetSuite, a NetSuite transaction that never actually cleared, a data entry error, or a PayPal/Amazon settlement netting issue. Work through Section 7’s diagnostic framework before making any adjusting entries.
7. Can NetSuite reconcile PayPal and Amazon settlement accounts?
Yes, but not with direct transaction-level matching. Payment processors deposit net settlement amounts that aggregate multiple orders, fees, and refunds into a single bank deposit. The correct approach is a clearing account: individual transactions post to the clearing account in NetSuite, and the net settlement deposit matches against the clearing account balance. Attempting to match individual order transactions to bank lines directly is the source of most ecommerce reconciliation problems we see on new NetSuite engagements.