As a business owner, one of the best things you can do is to integrate outsourced assembly production into your operations.
NetSuite Outsourced Manufacturing feature is one of the best examples of this.
But how do you set it up and use this module efficiently?
In this blog, we will walk you through the ins and outs of using NetSuite Outsourced Manufacturing.
Let’s begin by understanding what NetSuite Outsourced Manufacturing is.
What is NetSuite Outsourced Manufacturing?
Outsourced Manufacturing is a NetSuite feature that helps businesses manage the production of their goods by collaborating with external manufacturers.
It enables them to effectively control goods production by outsourcing assembly processes to external vendors.
This feature can automate various aspects of manufacturing workflows, such as
- Generating subcontracting orders for assemblies
- Coordinating the procurement of components for subcontracted production
- Simulating the production process with manufacturing sub-contractors
- Transferring partially finished assemblies to other sub-contractors
- Facilitating assembly drop-shipping to customers or shipping to the brand owner’s warehouses.
Importance of Using NetSuite Outsourced Manufacturing in Businesses
NetSuite outsourced manufacturing offers several benefits to businesses. Especially it helps them get relief from complex processes like supply chains and manufacturing. Here are the 9 reasons why you should consider using this feature:
- Efficiency & Automation: NetSuite Outsourced Manufacturing automates various aspects of production that reduce the need for manual efforts. It also supports coordination between different stages of manufacturing processes.
- Supply Chain Flexibility: Businesses can quickly adapt to changing market conditions and demand fluctuations using outsourcing manufacturing.
- Cost Savings: Outsourcing manufacturing tasks helps minimize fixed and variable overhead expenses. Furthermore, collaborating with external manufacturers allows businesses to contribute to overall cost savings.
- Focus on Core Competencies: Outsourcing non-core manufacturing activities frees up resources. This means you can focus on strategies essential for business growth.
- Scalability: NetSuite Outsourced Manufacturing provides the flexibility to scale production volumes up or down based on demand fluctuations without the constraints of in-house capacity limitations.
- Enhanced Collaboration: NetSuite facilitates better communication and collaboration with external manufacturing partners through integrated tools and shared data access.
- Risk Mitigation: Distributing production across multiple partners reduces the impact of interference in a single manufacturing source.
- Customer Satisfaction: Collaborating with external manufacturers helps in maintaining consistent product quality. This will ensure timely deliveries that meet customer expectations.
- Compliance and Traceability: NetSuite Outsourced Manufacturing assists in maintaining industry regulations and standards for the production of goods. Meaning the manufactured goods comply with legal requirements.
Just getting started with NetSuite?
Connect with our NetSuite Support team for tips!
Now, let’s discuss the steps to set up and use NetSuite Outsourced Manufacturing:
Step 1: Setting up NetSuite Outsourced Manufacturing
Before you can activate the outsourced manufacturing feature in NetSuite, it is mandatory to enable some prerequisites. If they are not already enabled, you will not be able to perform certain functions.
Now, to enable the prerequisites:
1. Login to NetSuite. Go to “Setup” on the NetSuite Dashboard.
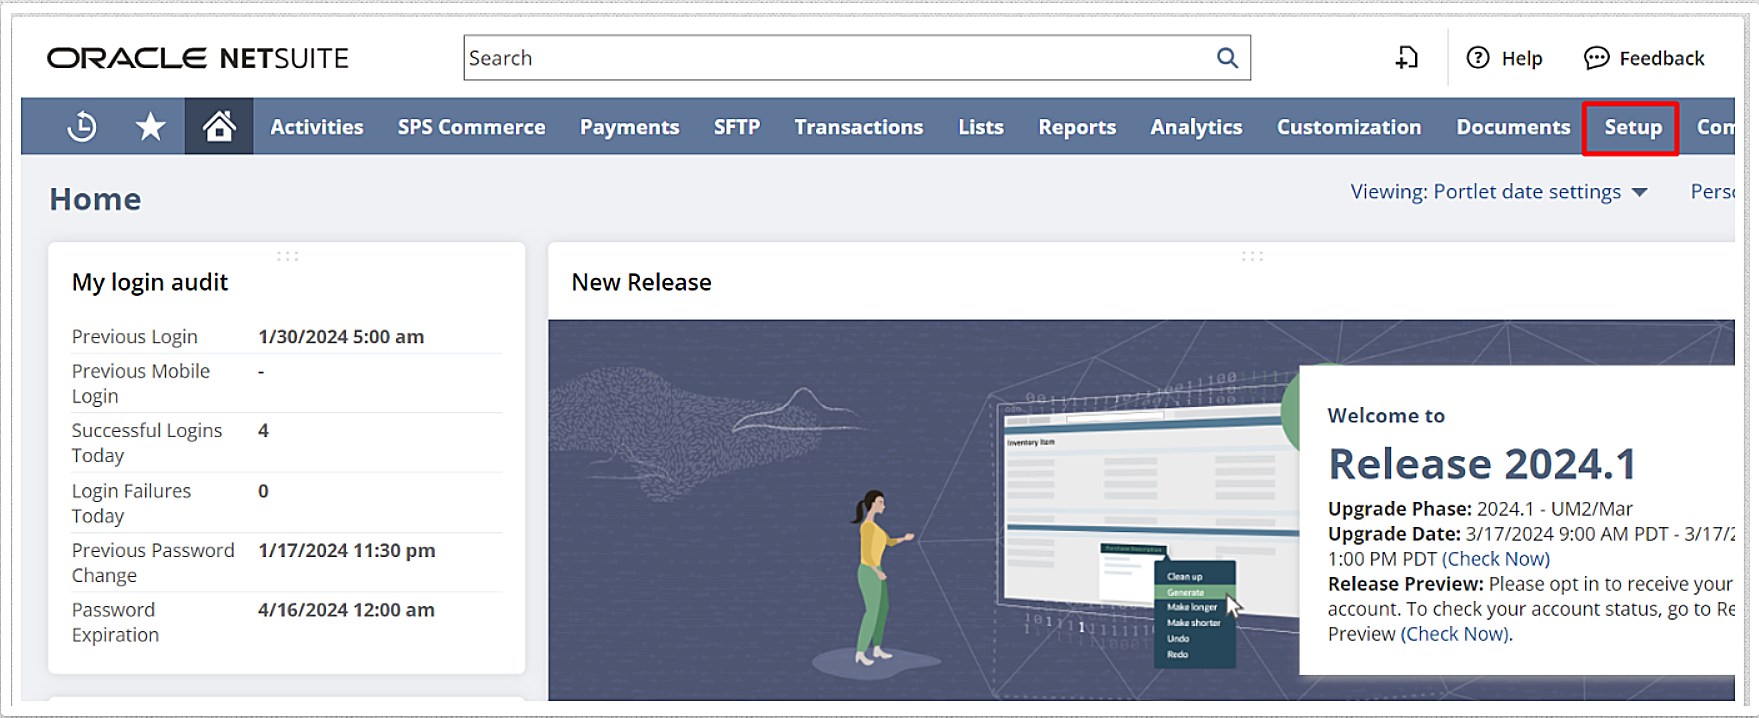
2. Click on “Company” and then “Enable Features” (Do remember you would need admin access to perform this step)

3. Check and enable the following features in different sections:
- a) Purchase Orders (It is available under “Transactions” subtab in the “Basic Features” section)
b) Advanced Receiving (It is available under “Transactions” subtab in the “Shipping & Receiving” section)
c) Multi-Location Inventory (It is available under “Items & Inventory subtab”)
d) Assembly Items ( It is available under “Items & Inventory” subtab) - e) Advanced Bill of Materials (It is available under “Items & Inventory” subtab)
- f) Work Orders (It is available under “Items & Inventory subtab”)
- g) After activating the above-mentioned features, click “Save”.
4. To enable the NetSuite outsourced manufacturing module:
5. Go back to “Setup”. Click on “Company” and then “Enable Features”.
6. Scroll down to the “Items & Inventory” subtab.

7. In the Inventory section, check the box labeled “Outsourced Manufacturing”.

8. Then, click on “Save” to update the changes done.

Now you’re ready to specify an outsourcing location for the vendor who will handle the goods manufacturing process.
Step 2: Configuring Outsourced Manufacturing
Once you’ve activated the Outsourced Manufacturing feature, the next step is to specify where your vendor will handle the manufacturing for you. Here’s a guide on how to define the outsourcing location:
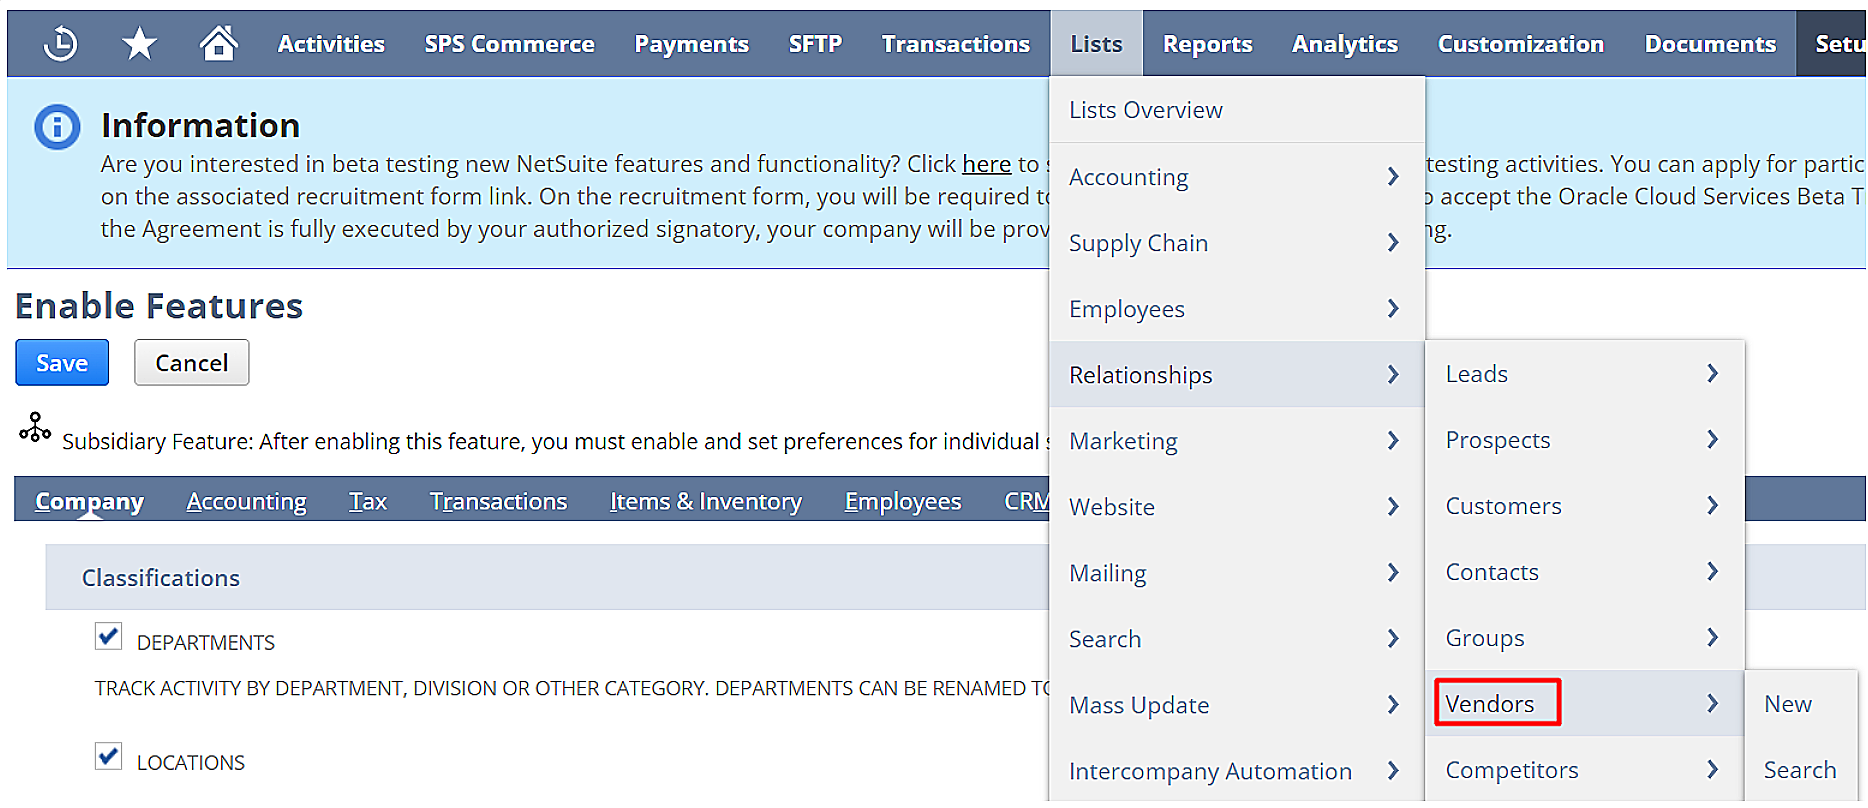
1. Go to “Lists” on the NetSuite Dashboard. Click on “Relationships”.
Note: Make sure you’ve already set up “Locations” in NetSuite before configuring your outsourced manufacturing location.

2. Then, select “Vendors” from the drop-down menu.
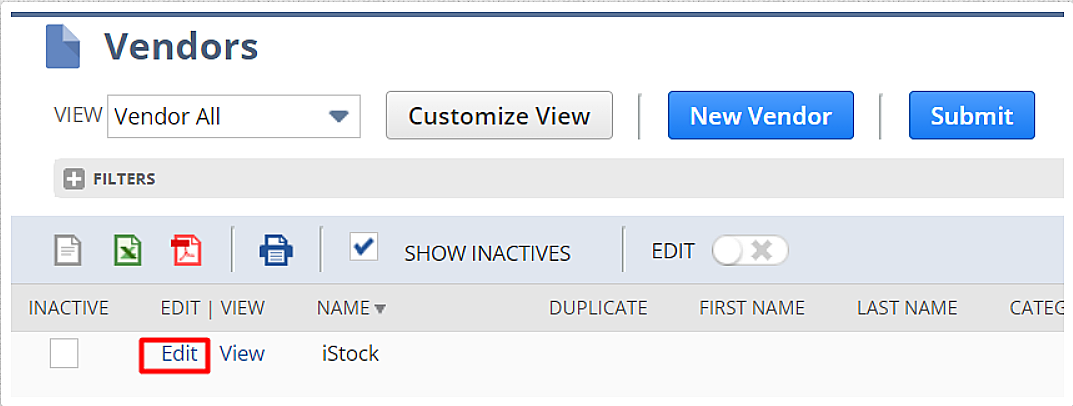
3. On the Vendors page, find and click on the “Edit” button next to the vendor who will be responsible for outsourcing manufacturing.
4. Then select the “Outsourced Manufacturing” section..

5. Click on the arrow icon available beside the “Manufacturing Locations” field.

6. Select the location (or locations), for the outsourcing vendor from the list of “Choose Manufacturing Location list”.
Note: You can assign each location to one vendor, but a vendor can be associated with multiple locations.
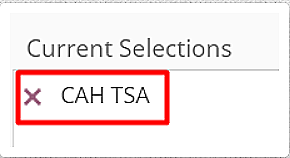
7. Once the locations have been selected, Click “Done”.

8. Then, update the made changes by clicking on the “Save” button.

Configuring Outsourced Assembly Bins for Locations
After defining an outsourced manufacturing location, it is necessary to organize and manage the inventory effectively. Hence, you are required to configure assembly bins for different locations.
Read more about NetSuite inventory management here.
This process will ensure that items produced by external vendors are properly assigned to specific bins. Consecutively, it will make it easier for a business to locate and track outsourced goods.
Follow the below instructions to configure outsourced assembly bins:
1. Enable Preferred Bins:
- a) Go to “Setup” button on NetSuite Dashboard. Then, find and select “Accounting Preferences” from the drop-down menu of the “Accounting” tab.
- b) Click on the “Items/Transactions” section.
- c) Check the box saying “Use Preferred Bin on Item Receipts“.
- d) Then, click Save.
2. Create a new “Location” for each bin.
3. Set Up Outsourced Vendor:
- a) Create an outsourced vendor.*
- b) Add your newly created location to this vendor.
4. Then, create an outsourcing manufacturing item.*
5. Now, you have to create an assembly item.
- a) For that, check the “Use Bins” box in the “Purchasing/Inventory” section.
- b) Select a “Location” in the “Bin Numbers” subtab.
- c) Add the new “Bin Number.”
- d) Clear the Preferred (per Location) box.
- e) Then, click Save.
6. After forming the assembly item, you have to create a “Bill of Materials (BOM)”.
7. Then, assign the “Bill of Material” to the assembly item.
8. To make sure a bin is accessible in the “Item Receipt Component” line, you have to make adjustments to the inventory for the new item.
(*) We will explain these steps later in this article.
Step 3: Managing Vendors and Contracts
The next step in NetSuite outsourced manufacturing is to create and manage supplier profiles. You also need to set up agreements with suppliers that include information like delivery dates, payment terms, etc.
The steps to create an outsourced vendor record in NetSuite are as follows:
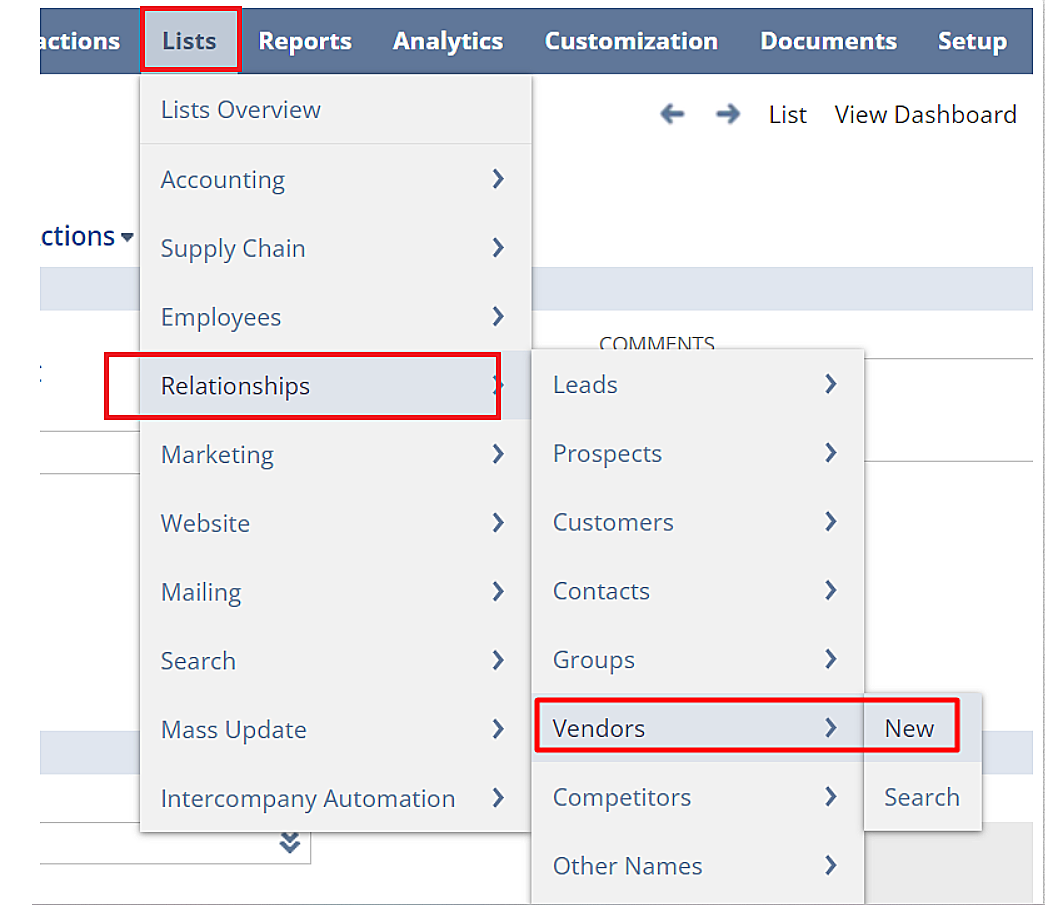
1. Go to “Lists” on NetSuite Dashboard, then click on “Relationships”. Now, click on the “New” button available in the “Vendors” section.
2. Choose a custom form or create a new one.
3. Fill in Primary Information:
- a) Enter Vendor ID (vendor’s name) and select the type (company or individual).
- b) Provide the legal name and web address.
- c) Select a category and add an image if needed.
- d) Enter additional comments.
- e) Enter the vendor’s email, phone number, and address.
4.Configure Classification and Subsidiaries:
- a) If you use NetSuite OneWorld, you must assign the primary subsidiary.
- b) Otherwise, add secondary subsidiaries on the “Subsidiaries” subtab.
5. Manage Relationships, Communications, and Files:
- a) Add contacts, phone calls, tasks, events, and files associated with the vendor.
6.Set default shipping and billing addresses
7. Provide financial and tax information.
8. Select default expense and payable accounts.
9. Choose payment terms and currency.
10. Enter your tax registration number and tax ID.
11. After adding all the information, click on “Save” to update the changes.
By thoroughly following these steps, you can create an in-depth vendor record in NetSuite.
Step 4: Creating an Outsourced Manufacturing Item
What follows next is to create an outsourced manufacturing item. It is the goods or services that will be manufactured in cooperation with the outsourcing vendor and sold to your customers. For this, you have to define the charge item that will be used in the purchasing transaction.
The steps involved in creating an outsourcing charge item are:
- Go to the “Lists” tab on NetSuite. Then, select “Items” available in the drop-down section of “Accounting”. Then, click “New”.
- Select “Other Charge for Purchase or Service For Purchase on the “New Item” page.
- Enter a unique “Item Name”, like “Bike Production charge.”
- Fill in other required fields on the page.
- Enter the “Purchase Price” on the” Purchasing” subtab.
- Select “Outsourcing Charge” in the “Cost Category” field.
- Under “Vendors”, select the outsourcing vendor.
- Check the “Preferred” box if this is your default vendor.
- You can also select a “Tax Schedule” on the “Accounting” subtab.
- Click “Save” to finalize the creation of the outsourcing charge item.
Updating BOM Revision Records
After you create the outsourcing charge item, it is essential to perform the following tasks:
- Creating a Bill of Material (BOM) Revision:
- a) In the BOM Revision, choose inventory components (e.g., bike seats, wheels for Bike Production).
- b) Include the Outsourcing Charge item.
- c) Specify quantities (e.g., 1 seat, 2 wheels, 1 charge item).
2. Click “Save” to finalize the BOM Revision.
3. Then, make an “Assembly Item” by choosing the BOM.
4. View “Assembly Item” Record:
- a) In the “Manufacturing” tab, click the “Assembly’s Revision” link.
- b) Edit components (if needed):
- c) In the “Components” tab, add the “Outsourcing Charge” item.
5. NetSuite auto-sets its quantity to one (1).
6. Finally, save the changes.
Step 5: Creating Work Orders and Tracking Production
NetSuite enables businesses to create work orders for outsourced manufacturing. However, you can outsource the manufacturing units from a purchase order as well. If you want to outsource production from a purchase order, you need to follow the below-mentioned instructions:
1. First, Create a Purchase Order:
- a) Go to “Transactions” on the NetSuite dashboard > Purchases > Enter Purchase Order.
- b) Choose “Standard Outsourced Purchase Order” in the “Custom Form” field.
- c) Select the outsourcing vendor and complete the order details.
2. Add Outsourced Items:
- a) On the “Items” subtab, click Items.
- b) Select the outsourced item from the “Assembly List”.
- c) Choose the outsourcing “Location”.
- d) Pick the item charge (e.g., Bike Production Charge as mentioned above).
- e) Enter the item quantity, and modify if needed.
3. Include Work Order (Optional):
- a) Select the “Bill of Materials” and “BOM Revision”.
- b) Click “Add” and continue adding lines based on in-house or outsourced production.
- c) Check the “Create WO” box for automatic work order creation.
- d) Click Save.
4. Review Work Order:
- a) After saving the purchase order, find the work order link on the “Items” subtab.
- b) Click the “Work Order” number link to view details.
- c) Check the “Outsourcing” subtab for relevant outsourcing information.
5. Receive Items:
- a) On the “Purchase Order” page, click “Receive”.
- b) Choose items to receive on the “Item Receipt” page.
- c) Select the “Location” for the final item.
- d) Click “Save”.
6. Review Assembly Build:
- a) NetSuite automatically creates assembly-build transactions.
- b) Click an “Assembly Build” link to review build details.
Step 6: Inventory Management and Tracking
Till now, you have created a work order for an outsourced manufacturing item in NetSuite. The next process involves managing inventory and tracking the production of the goods that we have outsourced.
Since NetSuite allows seamless integration with its different modules, you can combine outsourced manufacturing with inventory management.
in the application.
This integration is necessary because it will facilitate easy management of inventory to avoid shortages. Furthermore, you can ensure on-time delivery of outsourced manufacturing items. You can take advantage of NetSuite’s inventory management tool by:
- Efficiently monitoring stock levels
- Tracking item movements
- Improving visibility into inventory
- Optimizing inventory for both in-house and outsourced items
Step 7: Quality Control and Inspections
In addition, businesses can Implement quality control features in NetSuite for outsourced manufacturing units. This feature will take control of the quality of products that outsourced vendors produce.
You can leverage NetSuite’s quality control feature to:
- Define the product’s inspection criteria
- Conduct regular checks to justify stringent quality standards
- Minimize defects in outsourced production units
Step 8: Using Reports and Analytics
Another NetSuite feature that you can integrate with outsourced manufacturing to further streamline this process is “Reports and Analytics”. You can make the most out of this reporting tool by:
- Analyzing data and generating reports for outsourced manufacturing
- Generating real-time reports and making informed decisions
- Identifying bottlenecks and solving the issues on time
- Gaining actionable insights into outsourced manufacturing operations
Getting stuck in any of the steps above?
Why not ask our NetSuite experts!
7 Challenges and Problems with NetSuite Outsourced Manufacturing
When it comes to effectively managing NetSuite outsourced manufacturing, some challenges do come in the way. Therefore, you must understand and solve these challenges to obtain the most benefits.
In this context, we’ll explore some common challenges that you might face while setting NetSuite outsourced manufacturing process. Also, we will look at the best possible solutions.
1. Difficulty in Communicating BOM Changes
Challenge: Difficulty in communicating Bill of Materials (BOM) changes to outsourced partners.
Solution: Implement a robust change management system within NetSuite. Make use of communication channels and establish a collaborative platform for real-time updates.
2. Reworks and Loss of Materials
Challenge: Reworks and material losses due to miscommunications or errors in the manufacturing process.
Solution: Enhance quality control measures in NetSuite. Conduct thorough inspections and implement proactive communication channels to address issues promptly. Implementation of this stringent method will also reduce the need for reworks.
3. Increased COGS (Costs of Goods Sold)
Challenge: Rising “Costs of Goods Sold (COGS)” impact profit margins in outsourced manufacturing.
Solution: Regularly analyze and optimize cost structures within NetSuite. Negotiate cost-effective agreements with vendors and explore bulk purchasing opportunities to reduce COGS.
4. Decreased Ability to Launch New Product Lines or Version Changes
Challenge: Challenges in launching new product lines efficiently.
Solution: Streamline product development workflows in NetSuite. Collaborate closely with vendors on design changes and invest in training to align production teams with new product requirements.
5. Delays in Production
Challenge: Production delays affect timelines and delivery schedules.
Solution: Implement production scheduling tools in NetSuite. Maintain transparent communication with vendors and proactively address potential bottlenecks to minimize delays.
6. Quality Assurance Issues
Challenge: Quality assurance concerns lead to defective products and customer dissatisfaction.
Solution: Utilize NetSuite’s quality control features. Conduct regular inspections and collaborate with vendors to establish stringent quality standards.
7. Manual and Duplicate Work
Challenge: Manual and duplicate work processes lead to inefficiencies.
Solution: Automate routine tasks within NetSuite. Take advantage of workflow automation and eliminate redundant processes to enhance efficiency. This step will also reduce the likelihood of errors.
NetSuite Outsourced Manufacturing: Is it Even Worth it?
Absolutely! NetSuite Outsourced Manufacturing is worth your time and effort. Effective collaboration with an external goods manufacturer brings efficiency and flexibility to a business. When you delegate the less important tasks, you create more time to focus on your core competencies.
We trust our provided instructions to set up and use NetSuite outsourced manufacturing will offer you clarity. Over that, if you adhere to the best practices outlined above to address common challenges will ensure the sustainability of this process within your system.
Despite that, if you face any issues while setting up outsourced manufacturing or any other NetSuite module, you can contact us. Our experienced NetSuite team will offer you guidance immediately.


