
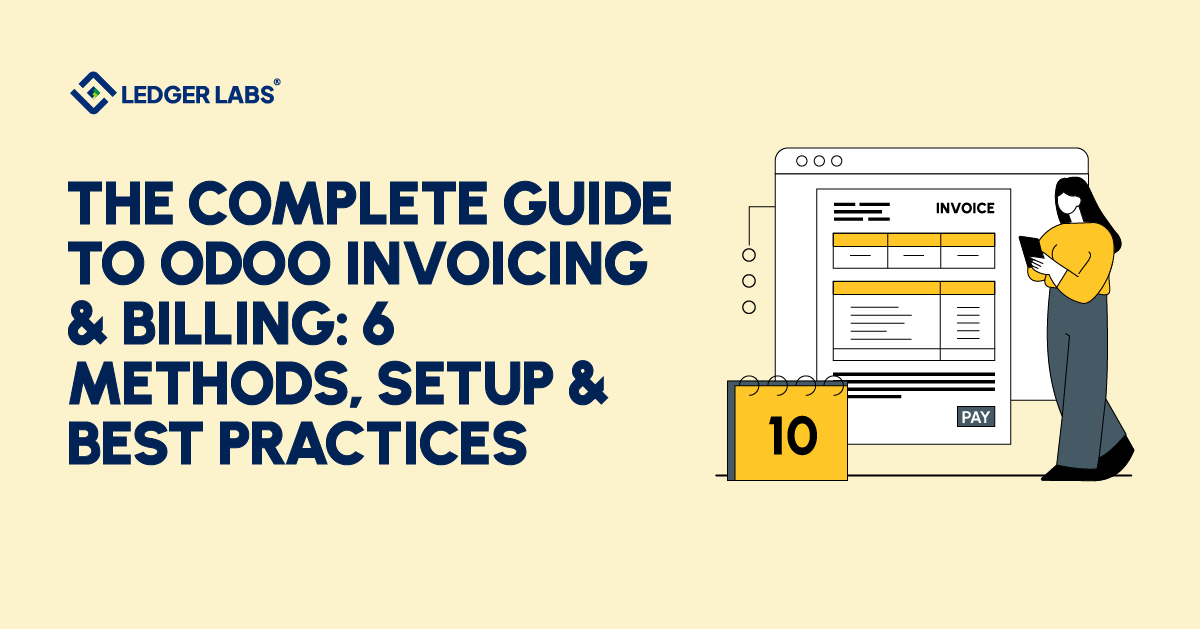
Odoo Invoicing is part of the Odoo ERP and generates customer invoices from sales orders, timesheets, projects, subscriptions, and eCommerce checkouts. It also automates payment collection, reminders, and reconciliation. When used correctly, it can replace the tedious spreadsheet billing process many businesses face. However, if misused, it may be avoided.
Success depends on two key choices: picking the right invoicing method for your business and setting up automation to minimize manual work.
This guide covers the six invoicing methods Odoo offers, step-by-step setup, important automation workflows, and common mistakes we see when managing a client’s Odoo instance.
We’re a CPA-led outsourced accounting firm. We implement and run Odoo invoicing for SMBs in the $1M–$20M range across ecommerce, SaaS, manufacturing, and professional services.
Key Takeaways
- Late payments can significantly impact cash flow, so Odoo’s reminders and reconciliation automations help speed up payment cycles.
- Odoo offers six invoicing methods tailored to different business models, making it crucial to choose the right one to avoid manual corrections.
- The real-time savings come from automating invoice generation, payment reminders, and bank reconciliation, helping clients reclaim valuable hours.
- Odoo Community provides basic invoicing features, while Enterprise includes more advanced tools, so understanding these differences is essential for planning.
- Compared to QuickBooks, Xero, and FreshBooks, Odoo excels in seamless integration with a full ERP system, offering more billing methods and automation, albeit with a more complex setup.
- Odoo Invoicing quickly generates invoices from existing data, closely integrating with modules like Sales and Inventory to reduce manual entry errors.
- The invoicing module automates billing policies and payments, supports multiple currencies, and sends reminders when invoices are overdue.
- Odoo Invoicing is ideal for small businesses aiming to streamline their billing process, while mid-sized companies can standardize billing policies across departments.
What Is Odoo Invoicing & Billing?
Odoo Invoicing & Billing helps you create invoices, process payments, and match them with your accounts within the Odoo ERP system.
It uses the same database as Sales, Inventory, Projects, Timesheets, and eCommerce, so invoices are often generated from confirmed orders, logged hours, completed milestones, or shipped products.
What the module does day to day:
- Generates invoices from source documents: sales orders, projects, timesheets, and deliveries, rather than manual data entry.
- Applies an invoicing policy: bill for ordered quantities up front or for delivered quantities after fulfillment.
- Connects to payment providers: Stripe, PayPal, Authorize.net, and others, so customers can pay from the invoice.
- Handles multi-currency: invoices international customers in their currency with automatic conversion and gain/loss tracking.
- Automates follow-ups: reminder emails fire on the schedule you set when invoices go overdue.
- Reconciles payments: matches incoming payments to open invoices, keeping Accounts Receivable clean.
Odoo Invoicing vs Odoo Accounting App: What's the Difference?
This trips up almost everyone evaluating Odoo, and it’s worth getting straight before you install anything.
Odoo Invoicing is the lighter app. It does customer invoices, vendor bills, payment registration, and basic taxes. It’s built for businesses that need to bill customers and record what they’re owed and what they owe, without a full accounting department.
Odoo Accounting is a full double-entry accounting system. It includes everything in Invoicing, then adds bank reconciliation automation, multi-currency depth, analytic accounting, asset management, budgets, full financial statements, and the controls an accountant needs to actually close the books.
The practical rule: if a bookkeeper or accountant is responsible for your month-end close, you want Accounting. If you only need to issue invoices and track receivables and payables, Invoicing is enough, and you can upgrade later without losing data, since both apps share the same underlying structure. One more wrinkle: Odoo Accounting is an Enterprise app, while basic invoicing is available in Community. More on that below.
Who Actually Needs This?
- Small businesses use Odoo invoicing to eliminate manual invoice creation and stop missing bills.
- Mid-sized companies use it to enforce one consistent billing policy across multiple people and teams.
- Larger operations use it for multi-currency, multi-entity billing that spreadsheets can’t track reliably.
Businesses that get value from invoicing manage it effectively and view it as a system with rules. If you’re still creating invoices by hand or using a separate tool for speed, your invoicing system likely isn’t set up properly.
Is Odoo Invoicing Free? Community vs Enterprise
Short answer: partly. Odoo offers two editions, and the invoicing capabilities differ significantly between them.
Odoo Community is free and open-source. It offers basic invoicing features like customer invoices, vendor bills, payment registration, simple templates, and standard taxes. This version works well for small businesses with straightforward billing.
Odoo Enterprise requires a monthly fee per user and includes essential features for growing businesses, such as a Subscriptions app for recurring billing, automated reminders, bank synchronization for reconciliation, Odoo Studio for custom fields, and a full Accounting app.
Here’s the edition split across the six methods, so you can see what “free” actually covers:
| Capability | Community | Enterprise |
|---|---|---|
| Manual / fixed-price invoicing | Yes | Yes |
| Timesheet-based invoicing | Yes (with Project + Timesheets) | Yes |
| Milestone-based invoicing | Yes | Yes |
| Subscription / recurring billing | Workaround only (recurring rules; no auto-charge or customer portal) | Yes (full Subscriptions app) |
| Delivered-quantity invoicing | Yes | Yes |
| eCommerce invoicing | Yes (with eCommerce app) | Yes |
| Automated follow-ups/dunning | No | Yes |
| Bank sync + auto-reconciliation | Limited/manual | Yes |
| Odoo Studio (custom templates/fields) | No | Yes |
Start with Community if your billing is simple and you want to test the workflow. Move to Enterprise when you encounter issues with recurring billing, automated collections, or accounting, usually after a few hundred invoices a year. For more details, see our Odoo Community Edition guide and walkthrough on choosing Odoo Enterprise.
6 Odoo Invoicing Methods: Which Is Right for Your Business?
Choosing the wrong invoicing method is a common mistake that leads to ongoing manual adjustments, credit notes, and customer billing disputes.
Odoo provides six invoicing methods because different businesses recognize revenue at different times. For instance, a SaaS company billing monthly subscriptions differs from a contractor billing project milestones or a distributor shipping varying quantities.
How to Choose Your Method?
Three questions settle it:
- When do you know the final billable amount – up front or only after you deliver?
- How often do you bill the same customer – once, or on a recurring cycle?
- Does your price change based on what you actually deliver – fixed, or variable?
Your invoicing method should match when money is earned in your business, not when it’s convenient to send an invoice. Get that alignment right, and billing runs itself. Get it wrong, and you’re permanently in cleanup mode.
Method Comparison Table
| Method | Best for | Setup complexity | Automation level | Ideal business size |
|---|---|---|---|---|
| Manual (Fixed Price) | Product sales, fixed pricing | Low | Low | All sizes |
| Timesheet-Based | Hourly services, consulting | Medium | Medium | Small to Medium |
| Milestone-Based | Long-term projects | Medium | Medium | Medium to Large |
| Subscription | Recurring services, SaaS | Low | High | All sizes |
| Delivered Quantity | Variable quantities, bulk orders | Medium | Medium | Small to Large |
| eCommerce | Online sales, retail | Medium | High | All sizes |
Each method is detailed below, along with its setup steps.
Method 1 - Manual Invoicing (Fixed Price)
The most straightforward method. You bill a set amount for a product or service regardless of what happens during delivery. A $500 website redesign has an invoice of $500. One hundred units at $10 invoices at $1,000. No mid-process recalculation.
Who Should Use Fixed-Price Invoicing?
- eCommerce product sales: sell a laptop for $899; invoice $899.
- Wholesale distributors: fixed per-unit pricing with volume discounts where needed.
- Fixed-price service packages: marketing retainers, maintenance contracts, and defined-scope consulting.
Your Two Policy Options
When you set up a fixed-price product, you pick one of two invoice triggers:
- Ordered quantities: Odoo creates the invoice when the customer confirms the sales order. Faster cash flow, but risky if you can’t deliver everything.
- Delivered quantities: the invoice is issued only after you validate the delivery. Slower payment, but you only bill what actually shipped.
Setting Up Fixed-Price Invoicing (5 Steps)
Step 1: Open the product and set its Invoicing Policy under the product settings.
Step 2: Choose Ordered quantities or delivered quantities based on your cash flow needs.
Step 3: Configure pricing rules: fixed price, volume discounts, and customer-specific pricing.
Step 4: Customize the invoice template with your branding, payment terms, and remittance details.
Step 5: Run a test sales order to confirm that the invoice generates correctly.
Pros & Cons
Pros: Simple to implement; customers see clear pricing up front; almost no training required.
Cons: Every invoice requires manual action; you click “Create Invoice” for each order. Poor fit for variable pricing or partial shipments.
But what if you bill by the hour instead of by the product? That’s timesheet-based invoicing.
Method 2 - Timesheet-Based Invoicing
Fixed pricing works until you bill by the hour, at which point manual invoicing becomes spreadsheets and arithmetic errors.
Timesheet-based invoicing connects logged hours directly to customer invoices. A consultant logs 8 hours on Tuesday; those 8 hours are billed at the agreed rate. No re-entry, no forgotten time, no month-end reconciliation scramble.
Who Needs Hourly Billing?
This method fits service providers who sell time:
- Consulting firms: strategy, implementation, advisory hours.
- Law offices: billable hours per case or matter.
- Marketing agencies: creative, campaign management, media buying.
- IT service providers: support tickets, maintenance, project work.
How Timesheet Invoicing Works?
Employees log hours in Odoo Timesheets (desktop or mobile). Those hours are reflected in the linked sales order. When you’re ready to bill, Odoo generates the invoice from logged time, with no manual calculation. This is the simplest form of Odoo invoice automation: the system does the math.
Setting Up Timesheet Billing (5 Steps)
Step 1: Enable the Timesheets app in Odoo settings.
Step 2: Create a service product with your hourly rate (e.g., “Consulting Services, $150/hour”).
Step 3: Link a project to the sales order so hours flow correctly.
Step 4: Configure the invoicing trigger, invoice timesheet entries monthly, weekly, or on demand.
Step 5: Set up a review/approval step if managers need to validate hours before billing.
Why Automation Matters Here?
Real-time profitability tracking is the underrated benefit. You can see whether a client project is profitable while it’s running, not three weeks later when the invoice finally goes out. Logging hours in real time also captures time that gets lost when people reconstruct their week from memory.
But what if you don’t bill by the hour or by fixed price, what if you invoice at project stages? That’s milestone billing.
Method 3 - Milestone-Based Invoicing
Hourly billing works until you’re running a six-month project, then waiting until completion to invoice strangles cash flow.
Milestone-based invoicing bills at defined project stages. Finish the design phase, invoice 30%. Finish development, invoice another 40%. You’re paid as you deliver, not months after you started.
Who Should Use Milestone Billing?
- Software development projects: bill at design, development, testing, and launch.
- Construction companies: invoice at foundation, framing, rough-in, and completion.
- Long-term consulting engagements: discovery, strategy, implementation, optimization.
- Marketing campaigns: kickoff, creative approval, launch, performance review.
Setting Up Milestone Invoicing (5 Steps)
Step 1: Create a service product and set its invoicing policy to Based on Milestones.
Step 2: Define project milestones with clear deadlines and deliverables.
Step 3: Link each milestone to specific deliverables that the client can verify.
Step 4: Set automatic or manual invoice triggers (auto-bill on milestone completion, or review first).
Step 5: Configure payment terms per milestone (Net 15, Net 30, due on receipt).
Why This Method Works?
- Steady cash flow: you’re not funding a six-month engagement out of pocket.
- Client visibility: invoices tied to completed work make spending legible; clients see which milestones are done, in progress, or upcoming.
- Fewer disputes: it’s hard to dispute payment for completed, verified deliverables. The milestone structure creates natural approval checkpoints.
A Common Milestone Structure
- 30% up front kickoff and discovery (secures commitment).
- 30% at mid-point design or strategy approval (validates direction).
- 30% at completion, final delivery, and handoff.
- 10% retention 30 days post-launch (covers the support period).
This splits risk: you’re not carrying the whole engagement, and the client isn’t paying in full for undelivered work.
But what if your customers pay you every month for the same service? That’s subscription billing.
Method 4 - Subscription & Recurring Invoicing
Milestone billing fits one-time projects. But if you bill the same customers every month, you want subscription invoicing, set it once, and Odoo handles billing on schedule indefinitely. A customer signs up for $99/month; Odoo generates and sends that invoice on the same day every month. No manual step, no “we forgot to bill them in July.”
Who Needs Subscription Billing?
- SaaS companies: monthly or annual software licenses.
- Membership organizations: gyms, associations, clubs.
- Subscription boxes: recurring physical deliveries.
- Maintenance contracts: HVAC plans, IT support agreements.
- Per-user software licensing.
What Makes Subscription Invoicing Powerful?
- Flexible Billing Frequencies: Options include daily, weekly, monthly, quarterly, or yearly.
- Automatic Invoicing: Set your schedule once; invoices are sent automatically every cycle.
- Payment Retry Logic: Odoo retries declined payments and sends recovery emails.
- Proration: Upgrades mid-cycle are automatically prorated.
- Self-Service Portal: Customers can easily manage subscriptions, payment methods, and invoices.
Setting Up Subscription Billing (6 Steps)
Step 1: Install the Odoo Subscriptions app (an Enterprise feature — see the note below).
Step 2: Create a subscription template with pricing tiers and billing frequency.
Step 3: Configure the billing frequency (monthly, yearly, or custom intervals).
Step 4: Connect a payment provider for automatic charges (Stripe, PayPal, etc.).
Step 5: Enable automated payment reminders for upcoming renewals.
Step 6: Configure dunning management for failed payments, retry schedules, and escalation emails.
Note: The Subscriptions app requires Odoo Enterprise. With Odoo Community, you can use recurring rules for billing, but you miss out on automatic payment processing and a customer portal. If your business depends on recurring revenue, Enterprise is often worth it. For SaaS and startup billing, see our Odoo for startups guide.
But what if what you ordered isn’t what actually ships? That’s delivered-quantity invoicing.
Method 5 - Delivered Quantity Invoicing
Subscription billing charges customers the same amount each cycle. In contrast, delivered-quantity invoicing bills customers based on what they actually receive.
This is crucial for products with varying weights, volumes, or quantities, as the delivered quantity differs from the order quantity.
When Is Delivered Quantity Invoicing Essential?
- Food suppliers: fresh produce and meat sold by weight (a “10kg box” might be 9.8kg or 10.2kg).
- Liquid distributors: fuel, chemicals, and beverages sold by volume.
- Bulk material sellers: gravel, sand, grain measured at delivery.
- Partial-delivery scenarios: when you can only fulfill part of an order due to stock.
Why This Method Matters?
- Ordered ≠ delivered: Promise 100 units, ship 95 after QC, and without delivered-quantity invoicing, you’re hand-editing every invoice or fielding disputes from customers billed for goods they never got.
- Expectations stay aligned: Customers see exactly what arrived; the invoice matches.
- Fewer disputes: The validated delivery order is the source of truth; when a charge is questioned, you point to it.
Setting Up Delivered Quantity Invoicing (5 Steps)
Step 1: Set the product’s invoicing policy to Delivered Quantities on the product form.
Step 2: Create and confirm the sales order as normal.
Step 3: Validate the delivery order. This is where Odoo captures the actual amounts delivered.
Step 4: Odoo automatically calculates the delivered amounts from the validated delivery.
Step 5: Generate the invoice from the delivery; it uses actual, not ordered, quantities.
The system handles partial deliveries automatically: ship 50 units today and 50 units next week, and Odoo generates an invoice for each delivery.
Real-World Example
A food distributor receives an order for 100kg of chicken breast at $8/kg ($800). At delivery, the actual weight is 97.5kg after trimming and QC. With delivered-quantity invoicing, Odoo generates an invoice for $780 (97.5kg × $8), not the original $800. The customer pays for exactly what they received. No manual adjustment, no refund, no dispute.
For businesses where this is the norm rather than the exception, our Odoo for manufacturing guide goes deeper on inventory-linked billing.
Method 6 - eCommerce Invoicing
Delivered-quantity invoicing handles physical shipments. But what about customers checking out online at 2 a.m.?
Odoo eCommerce invoicing automates the full payment-to-invoice process. A customer adds items to the cart, pays by card, and Odoo generates the invoice, sends the receipt, and updates the books, before they close the browser tab.
Who Needs eCommerce Invoicing?
- Online retailers: physical products sold through your site.
- Dropshipping businesses: order fulfillment and customer billing without held inventory.
- Digital product sellers: software, courses, templates, ebooks.
- Multi-channel sellers: site plus marketplaces.
What Makes eCommerce Invoicing Different?
- Automatic invoice creation on order completion: the moment payment clears, the invoice is generated.
- Payment provider syncs: Stripe, PayPal, Authorize.net, and others flow directly into the books.
- Multi-currency: sell into multiple countries and automatically invoice in local currency.
- Tax calculation: Odoo applies sales tax, VAT, or GST based on the customer’s location and product type.
- Digital receipt delivery: branded PDF receipts emailed instantly.
Setting Up eCommerce Invoicing (5 Steps)
Step 1: Enable the Odoo eCommerce app from the Apps menu.
Step 2: Configure payment acquirers (Stripe API keys, PayPal credentials, etc.).
Step 3: Set invoicing to trigger on payment confirmation, not order placement.
Step 4: Customize invoice email templates with your branding and support info.
Step 5: Enable customer portal access so buyers can download invoices at any time.
Setup tip: Trigger invoicing after payment confirmation, not at order placement. Otherwise, you generate invoices for abandoned carts and failed payments, and create cleanup work later.
How to Set Up Odoo Invoicing? A Step-by-Step Implementation
You’ve chosen a method, now set up the basics. Many people overcomplicate Odoo setup, but it only takes 30 to 45 minutes if you know what to do.
Initial Configuration (5 Steps)
Step 1: Access settings
- Go to Accounting/Invoicing → Configuration → Settings.
- Enable what you need: customer invoices, vendor bills, payment terms, and multi-currency.
Step 2: Configure company details
- Add your logo, full business address, and tax ID.
- Set your default currency; it affects every invoice.
- Configure your Odoo tax rules so the right rates apply by location and product
- Set your fiscal year if you’re not on a calendar year.
Note: If you’re starting fresh, get the chart of accounts in Odoo right before you issue invoices.
Step 3: Set up payment terms
- Define your standard terms, Net 30, Net 15, Due on Receipt, or 2/10 Net 30.
- Create custom terms for specific customer types and set defaults.
Step 4: Choose an invoice template
- Under Settings → Business Documents, pick a layout that matches your brand.
Step 5: Enable the customer portal
- Activate portal access so customers can view invoices, download PDFs, and pay online.
Customizing Invoice Templates
Your invoice template is a first impression. Configure:
- Branding: logo, brand colors, custom footer text, relevant links.
- Information fields: invoice number format, payment QR codes, bank details for wire transfers, and terms and conditions.
- Advanced customization: Odoo Studio (Enterprise) for custom fields, conditional display rules, and multi-language templates.
For anything beyond the standard layout options, see our guide to customizing invoice templates in Odoo and our Odoo accounting customization services.
Integrating Payment Gateways
Step 1: Go to Payment Acquirers
Step 2: Activate your gateway
Step 3: Enter your processor’s API credentials
Step 4: Configure accepted payment methods
Step 5: Set transaction-fee handling
Always test in sandbox mode before going live. US payment rail specifics are covered in the automation section below.
Odoo Invoice Automation: Workflows That Save Hours Weekly
Your system is set up, but if you click “Create Invoice” many times a week, you’re not using it to its full potential. Odoo invoice automation can automate billing tasks.
Instead of spending hours on invoicing, you can save time by automating decisions that don’t need a human touch.
For a complete guide, see the article on how to automate invoices in Odoo.
7 Automation Workflows Every Business Should Use
- Automatic invoice generation from sales orders: sales order confirmation triggers draft invoice auto-creation. Set under Sales → Settings.
- Scheduled recurring invoices: subscription renewal date hits, invoice creation, and sends. Subscriptions app or recurring rules.
- Automated payment reminders: invoice hits 7 days overdue, polite reminder; 30 days, escalated reminder. Configured via follow-up levels.
- Auto-reconciliation with bank feeds: bank transaction imports; Odoo matches them to open invoices and marks them paid.
- Invoice approval workflows: invoices over a threshold are routed to a manager before being sent. Catches pricing errors before customers see them.
- Batch invoice creation: select 30 sales orders, one click, 30 invoices.
- Smart payment allocation: allocates partial payments to the oldest invoices first, keeping aging reports accurate.
Credit Notes & Refunds in Odoo
Every business issues credit notes for returns, overcharges, or goodwill adjustments. In Odoo, you create a credit note directly from the original invoice, keeping a clear record.
You can issue a full or partial credit note and decide whether to refund the customer, leave a credit on their account, or reverse the invoice entirely.
Always generate the credit note from the original invoice to keep your accounts and records in order.
Self-Billing & Vendor Bill Automation (3-Way Match)
Odoo self-billing and vendor bill automation handle the accounts payable side. The control worth configuring is 3-way matching: Odoo checks the vendor bill against the purchase order and the receipt before approving the bill for payment.
If the three don’t agree on quantity, price, or receipt, the bill is flagged rather than paid. For any business with meaningful purchasing volume, this is the single most valuable AP control Odoo offers, and it’s a frequent reason businesses move from spreadsheet-based AP into Odoo.
Bank Reconciliation & Multi-Currency
Bank reconciliation is where automation pays off most quietly. With bank synchronization enabled, transactions import automatically, and Odoo proposes matches against open invoices and bills using reconciliation rules. The team reviews and confirms, rather than matching line by line. Our Odoo bank reconciliation guide covers the rule setup in detail.
Multi-currency matters the moment you invoice internationally. Odoo invoices customers in their currency, keeps your books in your base currency, and automatically tracks currency gains or losses. It also supports currency-specific price lists and multi-currency bank accounts. The deeper mechanics are covered in our multi-currency accounting guide in Odoo.
5 Common Mistakes We See in Real Odoo Implementations
When we take over a client’s Odoo instance, the same problems recur. None of them is Odoo’s fault; they’re configuration decisions that made sense in the moment and were never revisited.
Mistake 1: The invoicing method doesn’t match the business model
Someone set up fixed-price invoicing for a business with variable delivery quantities, or forced project work through subscription billing. The symptom is a steady stream of manual credit notes. The fix is usually re-mapping the product’s invoicing policy, disruptive, but it ends the cleanup cycle.
Mistake 2: Invoicing on order placement instead of payment confirmation (eCommerce)
This generates invoices for abandoned carts and failed payments, then someone spends a month-end voiding them. The trigger should be payment confirmation.
Mistake 3: No follow-up sequence configured
The business has Enterprise, has the dunning feature available, and never set it up, so collections is still a person remembering to send emails. Reminders and dunning are the highest-ROI automations Odoo offers, and they’re often left out.
Mistake 4: Credit notes are created as standalone negative invoices
This breaks the link to the original invoice, making AR reconciliation difficult. Credit notes should always be generated from the source invoice.
Mistake 5: Customer data is left dirty
Wrong email addresses, outdated payment terms, and missing tax positions. Invoices that never reach the customer can’t be paid on time, and incorrect fiscal positions produce tax errors that surface at the worst time. Clean customer data before you scale invoicing volume.
Our Odoo data cleaning guide covers the process.
Odoo Invoicing Best Practices
The businesses that spend the least time on billing follow the same handful of principles.
- Choose the right method from the start: Changing methods later can complicate data transfer. Test with 10–20 invoices before a full rollout and keep growth in mind.
- Automate everything that doesn’t require a decision: Set up automation during implementation, not six months later when you’re overwhelmed.
- Keep customer data clean: Ensure email addresses are accurate, payment terms are up to date, and tax information is correct. This is an easy way to improve reliability.
- Set smart payment terms: Offer early-payment discounts (e.g., 2/10 Net 30), partial-payment plans for large invoices, and standard terms to build trust.
- Stick to a regular reconciliation schedule: High-volume businesses check their accounts daily; most small- to medium-sized businesses do so weekly. Monthly checks are the minimum, but can be risky for cash flow.
- Use invoice templates wisely: Professional branding and clear payment instructions reduce questions about how to pay. Offer multiple payment options.
- Monitor key performance indicators (KPIs) that matter: Keep track of Days Sales Outstanding (aim for under 30 days), the invoice error rate (aim for under 2%), and the collection rate (aim for above 95%).
- Train your team well: Document your specific setup and plan refresher training each time Odoo updates its features.
- Ensure backup and security are strong: Use two-factor authentication for financial users, set up automated backups, and limit who can edit invoices.
- Stay updated: Follow Odoo’s release notes, test updates in a safe environment before going live, and time upgrades during periods of low activity to avoid month-end closing.
Conclusion
Odoo Invoicing & Billing changes how a growing business handles customer payments, but only when the method matches your model, and the automation is actually configured. The six methods, the Community-versus-Enterprise split, the automation workflows, and the common mistakes above are the decisions that determine whether the system runs itself or becomes one more thing your team has to work around.
If invoice processing still eats your week, or customers consistently pay late, you don’t have to solve it by trial and error. Our team implements and runs Odoo invoicing for SMBs across ecommerce, SaaS, manufacturing, and professional services, configured to match how your business actually bills.
Book a free 30-minute consultation to talk through your specific setup.
Frequently Asked Questions (FAQ)
Q1: Is Odoo invoicing free?
Partly, Odoo Community Edition is free and includes core invoicing, manual invoices, basic templates, and payment recording. Odoo Enterprise is paid (per user, per month) and adds subscriptions, automated follow-ups, bank sync, and Odoo Studio. For many small businesses, Community is enough to start.
Q2: Can I use Odoo invoicing without the full ERP system?
Yes, Odoo invoicing works as a standalone module; you can install just the Invoicing/Accounting app without CRM, inventory, or other modules. The advantage of Odoo is its integration, so if you later add inventory or sales, they automatically connect to your existing invoices.
Q3: How long does it take to set up Odoo invoicing?
The basic setup, company details, template, payment terms, and the first invoice take a few hours. Full implementation with automation workflows and payment gateway integration typically takes one to two weeks with proper planning. Complex Enterprise implementations with custom requirements take longer.
Q4: How do I set up recurring invoices in Odoo Community?
Community doesn’t include the full Subscriptions app, but you can approximate recurring billing using recurring rules. You’ll lose automatic payment processing and the customer self-service portal, which require Enterprise. If recurring revenue is central to your business, Enterprise is usually worth it.
Q5: Does Odoo support self-billing and vendor bill automation?
Yes, Odoo handles vendor bills and supports 3-way matching. It checks the vendor bill against the purchase order and the receipt before approving payment, flagging any mismatch. For businesses with meaningful purchasing volume, this is one of the most valuable AP controls Odoo offers.
Q6: Does Odoo integrate with my existing payment gateway?
Odoo natively supports many payment gateways, including Stripe, PayPal, Authorize.net, Square, and Adyen. If your gateway isn’t natively supported, a custom integration is possible via Odoo’s API. Most popular gateways require only an API credential.
Q7: Can Odoo handle e-invoicing and compliance requirements?
Odoo supports electronic invoicing formats and country-specific compliance, with the available formats depending on your localization and edition. If you operate in a region with e-invoicing mandates, confirm the specific format support for your country before relying on it.